How to Hem Flared Jeans Without Losing the Retro Kick
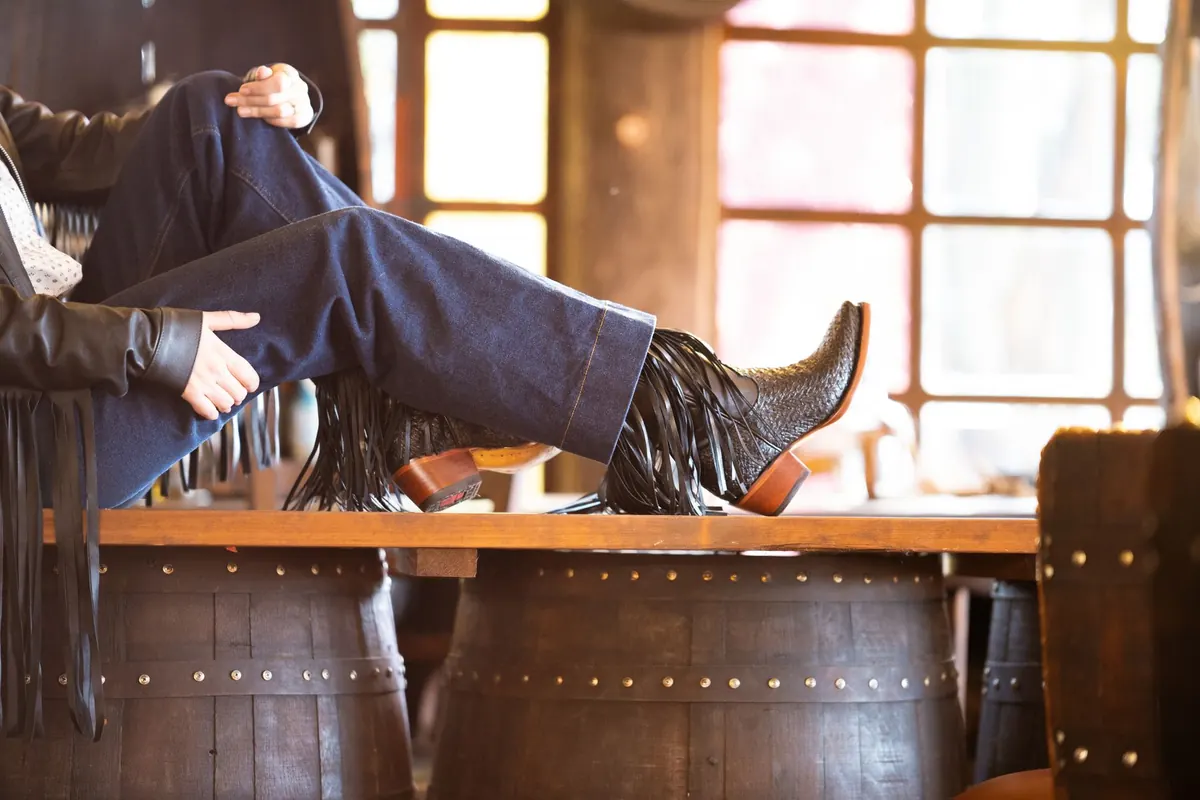
Flared jeans are a shape, not just a length. Take five centimetres off the bottom with a straight cut and you won't simply be shortening them — you'll be narrowing them, because the widest part of the leg is the bit you just removed. The fix is straightforward once you know where to add the width back. Here's how to shorten flares so they still kick out at the ankle, and how long to leave them for the shoes you actually wear.
Why a straight cut ruins a flare
A flare is a curve. The outer seam, and often the inner seam too, sweeps outwards from roughly the knee down to the hem. That means the leg is at its widest at the very bottom edge, and it narrows steadily as you travel upwards.
Cut four centimetres off the bottom and your new hem sits four centimetres higher up the leg, at a point where the circumference is smaller. On a gentle flare that might cost you two centimetres of width. On a proper seventies bell-bottom it can be the difference between a flare and a boot-cut. The seam also stops opening out neatly, so the silhouette reads as straight-legged with a slightly odd kink above the ankle.
There's a second issue: weight. A deep, doubled hem gives a flare something to hang from. Cut it off and thin the new hem, and the fabric can start to flap rather than fall.
Work out the length before you touch the scissors
Do this with the shoes on. Not similar shoes — the actual pair. A trainer's foam sole compresses under your weight and a platform's doesn't, and that difference of a centimetre or two is exactly the sort of thing you notice once the hem is sewn.
Flared jeans with trainers
For a classic retro look, the hem should skim the top of the shoe at the front and sit roughly a centimetre above the ground at the back. With slim trainers, that usually means a small break where the denim rests on the top of the tongue. With chunky, high-volume trainers, let the hem sit a little lower and rest on the shoe itself — you want the fabric to cover the top of the shoe rather than stop short of it, otherwise the flare looks cut off.
Flared jeans with platforms
Platforms are rigid, so the hem needs to clear the floor by roughly the height the sole lifts you, minus a centimetre or so of safety. Aim for the hem to finish level with the top of the platform's toe, grazing the sole without folding under your foot. Err on the generous side: a hem that sits half a centimetre off the ground looks deliberate, and a hem that drags will fray and trip you within a week.
If you genuinely wear both flats and platforms, hem for the shoe you wear most. Hemming for the taller shoe means your jeans will pool with trainers, which is a legitimate retro look but will scuff the hem; hemming for the flat shoe means platforms will show your ankles.
With the shoes on, pin a single marker at the front of each leg and check in a full-length mirror. Stand naturally, don't hitch the waistband. Then take the jeans off, lay them flat, match the seams and measure from the crotch seam down each leg to make sure both markers sit at the same height.
What you'll need
- Sharp fabric scissors or a rotary cutter and mat
- Tailor's chalk or a fabric marker
- Long pins, plus a tape measure or hem gauge
- A curved ruler or flexible curve — helpful, not essential
- Jeans needles (a 100/16 works for most denim)
- Topstitching thread in a colour that matches the original stitching — golden orange on classic denim, navy or tonal on darker pairs
- A machine that will cope with denim, or an overlocker if you have one
- An iron and a pressing cloth
The flare-preserving hem, step by step
- Mark your finished length, then add the hem allowance. Four centimetres for a double-turned hem, two for a single turn. Chalk the cut line right around, check both legs against each other, and only then pick up the scissors.
- Measure the original hem width. Lay the leg flat, seams aligned, and measure straight across the bottom edge — say 24cm. Write that number down. It's your target.
- Measure the leg at your new cut line. If it comes out at 21cm, you've just lost three centimetres of flare.
- Put the width back. Split the difference between the two seams — or add it all to whichever seam does most of the flaring on your pair — and redraw the seam line from around the knee downwards, easing outwards until the new hem measures 24cm across. Blend the curve gently. A hard diagonal looks like a mistake from two metres away.
- Cut both legs on the new line, left and right matching.
- Finish the raw edges with an overlocker, a zigzag stitch, or a folded-and-stitched edge if the denim is heavy.
- Press the hem up — a double turn of 2cm is standard on denim — pin, then baste and try the jeans on before committing.
- Topstitch in the same colour and the same number of rows as the original hem, with a jeans needle. Backstitch at both ends, then press again with a cloth and a little steam.
Test your machine on a scrap of the cut-off leg first. Denim thickness varies hugely, and it's much easier to adjust the tension on an offcut than on a finished hem.
The original-hem shortcut
If you like the faded, worn look of the existing hem, or you're working with vintage jeans, there's a method that leaves the flare completely untouched. Instead of cutting the hem off, cut off the excess length and leave a band of around three centimetres containing the original hem attached to the waste piece. Then slot that band back over the shortened leg, right sides together, stitch across, fold the band down so the original hem faces outwards, press and topstitch.
Nothing about the circumference changes, so the shape stays exactly as it was. The trade-offs are a horizontal seam ridge just above the hem, extra bulk on heavy denim, and a join that can look odd if you're removing more than about six centimetres — the seam ends up sitting far up the calf.
When to hand them to a tailor
Heavy raw denim, selvedge, dramatic bell-bottoms, embroidered or panelled pairs, and anything with a flare running down both seams. Ask whether they'll reshape the seam or use the original-hem method, because that changes the job considerably. Be clear about which shoes you'll wear with them.
The final check
Put them on with the right shoes, stand in front of a full-length mirror, and look at the line from knee to hem. The flare should still open outwards, and the hem should measure the same across as it did when you started. If it looks pinched, unpick the seam and let it out a little — hemming is reversible, but a hem cut too short isn't. Walk a few steps, sit down, and go up a flight of stairs. If the back hem is still clearing the ground, you're done.
Photo: timokefoto / Pixabay
You Might Also Like
From Gloucester Road's charity-shop trail to Sunday swaps in Southville, here's how to hunt, repair and trade retro fashion finds across Bristol.
A practical guide to the vintage cues — silhouette, fabric, colour and accessories — that make an outfit read retro rather than fancy dress, plus how to style them for everyday wear.